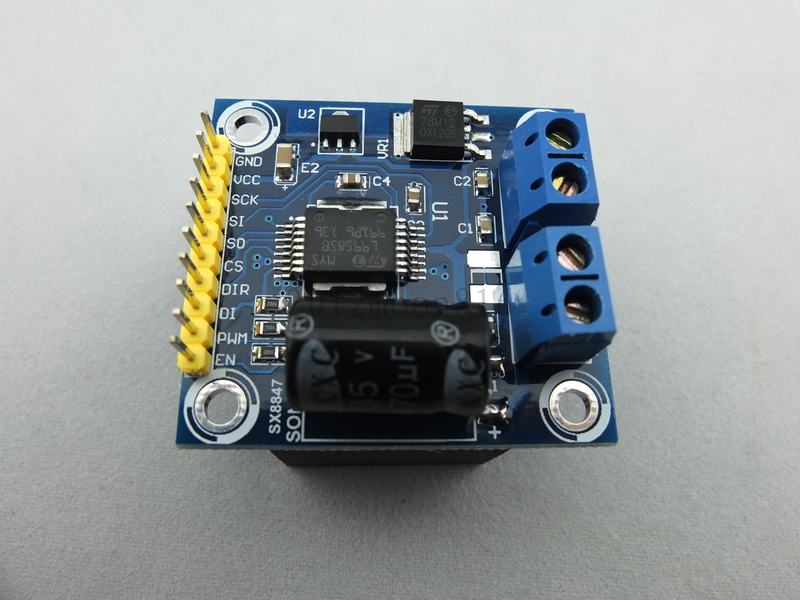
 The SONXUA SX8847 motor controller offers quite a lot! The eBay listing said 240 watt high-power H-bridge PWM motor driver module/smart driver for Arduino, for only $13.88! In addition it has programmable current limits, an SPI interface, and all kinds of indicators for under voltage, over voltage, over temperature, open load, etc. In brief, it offers lots of fancy features, and at a very reasonable price.
Here is a link to the eBay auction I used: http://www.ebay.com/itm/111153750411
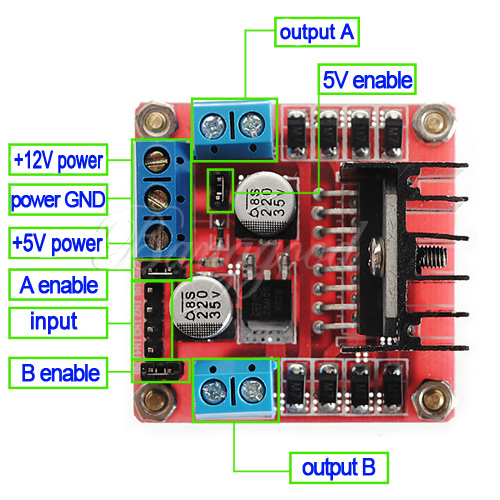
The other motor controller I tried is based on the simpler L298N, which offers two H-bridges, but less amperage. It is even less expensive at $5.99 (including shipping).
Here is the link I used: http://www.ebay.com/itm/290899895209
The chicken coop door I designed is 18"x18", and made out of 1/4" plywood. Other people have designed similar systems (here is one with a particularly clever locking door), and they used relays to control a cordless drill motor to raise and lower the door (link). For my design, I wanted to control the door more carefully (avoiding letting it bump against its stops), so I decided to try using these motor controllers with a cordless Ryobi 12v drill I picked up for $5 at a garage sale.
I used a cadmium-sulfide photocell to detect when to open and close the door. Open when it has been consistently light for the last 60 seconds, and close if it has been consistently dark.
I used three switches to detect where the door currently is. One at the very top, one almost at the top, and the third in the middle (which triggers when the top of the door passes by it and stops depressing the switch). I probably should have used two switches in the middle — one to detect when to decelerate from full to slow speed, and the second to detect when to stop, however I only had three on hand. The reason I didn’t place the lower switches at the bottom, was I wanted them to be as far as possible from the chickens, mud and other sources of trouble. Also, I arranged the almost top and middle switches so that the levers are hanging down, so that they will be less likely to have rain water drip into them. I suppose I could have used magnets and Hall effect sensors, but this is one of my first outdoor Arduino project, and I wanted to keep it simple to start with.
At first when I was working on this project I favored the L9958 because of all of its fancy features. I felt more secure with all the different protections and diagnostics it offered, but I found myself struggling to get it to actually work! I only found one reference on the net for how to work with the SPI interface (which is why I decided to write this and share my code). The first problem I had was that the 5v Vcc is somehow connected to the 12v Vss, but it shouldn’t be! Even if the Arduino was separately powered, if I tried to change the motor’s speed from 0 to 100%, it would go into an endless cycle of resetting the Arduino. The solution to this was to run the motor at reduced power. This actually worked pretty well, however after a while I decided that taking ~40 seconds to raise or lower the door was not quite to my liking, so I tried to have the motor accelerate to full power, and then decelerate back to half power before stopping. Now the good thing is that when controlling the motor with L9958 at half power, it would stop on a dime. However, even though it would happily switch speeds from 0% to 50%, 50% to 100%, and 50% to 0%, it would halt and become unresponsive when commanded to switch from 100% to 50%! In this case the SPI interface didn’t provide any useful debugging information. Resetting the device did cure the problem, but that is undesireable. Also, the L9958 caused the the motor to shake when run at other speeds besides 0%, 50% and 100%, so gradually ramping the speed from 50% up to 100% didn’t work well, and ramping the speed from 100% down to 50% always caused the lockup. Argh! This drove me to try the L298N.
 The L298N simply worked. It worked at a wide variety of speeds, it smoothly ramped between speeds, and the only problem I had was that I couldn’t find a speed where it would reliably lift and lower the door, and stop on a dime. To solve this problem, I decided to start at a slow initial speed (a brushed DC motor draws the maximum current when starting, so starting it slowly keeps it from initially drawing too much current), and ramping up to full speed within a second, and then down to an extremely slow speed, before stopping and reversing for a brief period (to avoid overrunning where I wanted it to stop). This raises or lowers the door in less than 10 seconds.
So in summary, the advantages of the L9958 are:
- Handles a lot more power: 240 watts vs. 25 watts, or 8.6 amps vs. 3 amps.
- Vss was somehow connected to Vcc, which caused multiple mysterious problems, and ultimately made me abandon using this controller!
- Unable to smoothly and reliably drive my motor at arbitrary speeds. There is something odd about the way the PWM cannot smoothly control the motor’s speed.
- SPI interface can provide debugging information.
- SPI interface can configure the maximum current to supply to the motor.
- Protection from over voltage, under voltage, etc.
- At half-power, the motor stopped on a dime — it didn’t coast at all.
- At half-power, the motor raised and lowered the door at exactly the same speed.
- At half-power, the motor had sufficient torque to reliably move the door both up and down.
- At full power it ran the motor substantially faster than the L298N could.
- Works with both 5v and 3.3v devices
- One thing to note: whenever the L9958 detects a problem, like under voltage, it sets an error flag and won’t to drive the motor until the flag is reset!
The advantages of the L298N are:
- Can independently control two 2 amp motors, or you can gang the inputs/outputs to drive one motor which uses up to 3 amps.
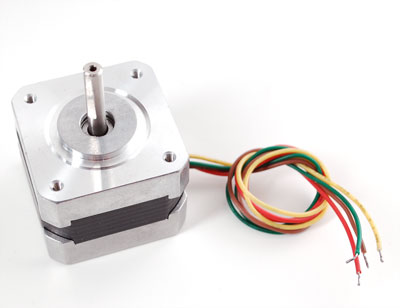
- Could control one stepper motor.
- Worked smoothly and reliably at every speed!
- Less expensive.
- Simpler interface, requiring only 3 pins vs. the L9958 which required 8 pins, leaving only one spare digital I/O pin on my Arduino!
- Required slightly more complicated programming (such as different minimum speeds for raising and lowering the door, reversing after stopping to prevent the motor from coasting, and gradually accelerating from the minimum speeds to full speed).
In the end, I decided that the L298N would be best for my application!
Here is a link to the Arduino sketch for the L298N version of my chicken coop door controller: ChickenDoor_L298N.ino
For comparison, here is a link to the Arduino sketch for the L9958 version of my chicken coop door controller: ChickenDoor_L9958.ino
A few notes:
- If you are going to use the L9958 version, you might try disconnecting Vcc between the Arduino and SX8847 — perhaps it will work more reliably that way.
- The programs use what I would call a state machine paradigm: at any given moment doorStatus indicates what the system should be doing: raising or lowering. The amount of light the photocell detects determines when to shift between these two. When the shift happens, the program changes the doorStatus, the motorSpeed is set, and the door moves while it continues to monitor the switches every millisecond. This makes the program simpler and more symmetric, and also makes it easier to detect errors, such as if the motor has been running too long, or the wrong switches get triggered.
- Sometimes I used the original Ryobi 17v 400ma wall wart with the L9958 (and USB power for the Arduino). However, other times I tested it with a PC power supply — even with the large number of amperes supplied by the 12v and 5v rails from the PC power supply, I still couldn’t get the L9958 to behave reliably. The L298N worked well with separate 12v 1A or 17v 400ma (motor) and 9v (Arduino) power supplies, as well as with a single 12v 2A wall wart.
- I removed all three jumpers on the L298N, so that the enable pins could be driven by the Arduino’s PWM and the 5v would be supplied by the Arduino.
- To quickly test opening the door, have light shine on the photocell and press the Arduino’s reset button. To quickly test closing the door, cover the photocell and again press the Arduino’s reset button.
I sure learned a lot of lessons in the course of this project!
Many thanks to the folks from Sparkfun and Maui Makers who put on an Arduino course here on Maui!
I’d originally planned to do this project using relays and a Raspberry Pi, and they mentioned that an L298N might be sufficient. My original measurements with this drill’s motor indicated that it draws up to 7 amps, which is why I tried using the L9958 first.
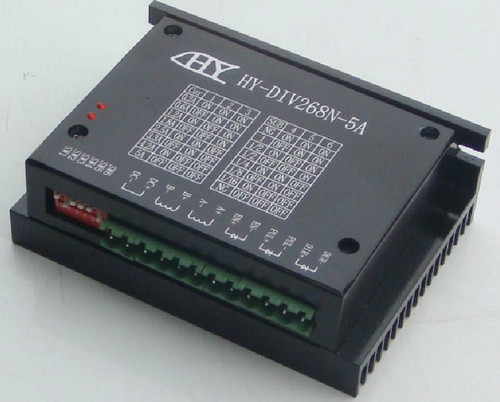
 The HY-DIV268N-5A is an inexpensive, powerful and flexible stepper motor controller which can drive motors rated between 200ma and 5 amps, at volages between 12v and 50v. Using a higher voltage is more desirable, because it makes the steppers run faster.